RTSP Live Video Stream
Posted on March 30, 2023
Introduction
This guide will explain how to set up a high quality live video stream over a home network. My previous blog showed how to install the DietPi operating system on a Raspberry Pi, so if you’re planning to use a Pi you should definitely watch that first. That guide also includes the necessary steps to setup the camera if you're using an RPi camera. The packages I’ll be installing today will actually work on any Debian or Ubuntu based distro, so desktops and laptops are fully supported as well. A few of the steps and configurations will be slightly different though, so I’ll try to point out the differences as I go in case you wanted to try this on something other than a Raspberry Pi. Also if you’re already running the stock Raspberry Pi OS then you can follow most of this guide too, but again there are a few minor differences since I’ll be using DietPi in this guide. And finally, it appears the Raspberry Pi 5 is not compatible with this guide, but all the older versions will work.

When it comes to which camera to use, there are several different versions of the Raspberry Pi camera, but if you’re on a budget the first version is only $10 these days and it still provides good quality with up to a 1080p/30fps video stream, which is more than enough for most applications. I’ll be using this one today. Also USB cameras will work too, but the CPU usage will be higher and can slow down the older Pi models, so I recommend using an RPi camera if possible.
Installing Software Packages
In the video for this guide I suggested to use the root user, but generally speaking it's best practice not to use the root user. I now suggest using the dietpi user instead. If using the dietpi user you'll need to enter these two commands to give your user permissions to access the camera:
sudo adduser dietpi video
sudo usermod -a -G video dietpi
Be sure to reboot the Pi before continuing
Now before we install packages, lets update the repositories by typing sudo apt update. After they update, enter sudo apt install v4l-utils and confirm the installation. This package allows for extra options and customizations with the camera. It shouldn’t take long to install. Next lets install FFmpeg which provides the media codecs, so enter sudo apt install ffmpeg. This package requires many dependencies so it’ll take a while to finish installing. If you're using DietPi then FFmpeg can also be found in sudo dietpi-software, and be sure to enable the camera and set the VRAM to 256 MB in sudo dietpi-config, as I went over in the DietPi video.
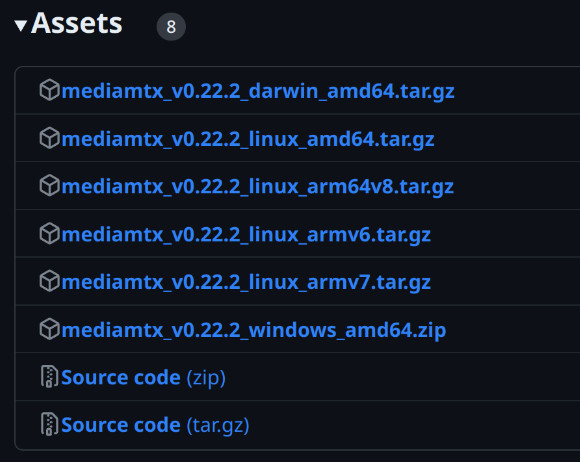
Once it’s done, we’re ready to install MediaMTX which is a network server for video streams that uses the RTSP protocol. It was formerly named rtsp-simple-server and that's what it was called when I originally made this guide, so if you see any references to rtsp-simple-server, now you know why. Simply replace it with MediaMTX. There are other protocols that are commonly used as well, but I’ve found that RTSP offers the best performance and latency. We’ll need to download this software directly from Github. If you’re using a desktop or laptop then you’ll want to copy the entire filename ending in linux_amd64. If you’re using a Raspberry Pi then you'll need one of the arm versions. The original RPi and RPi Zero typically use armv6 while the newer Pis will use either armv7 or arm64v8 depending on which version you flashed when installing the OS. The most recent DietPi version uses arm64v8. This is what I’m currently running so I’ll copy the filename that contains arm64v8. Also note the version of MediaMTX in the filename. When I originally wrote this guide the latest version was v0.22.2, but feel free to use a newer version.
Before entering the following command, first make sure you’re in the home directory. You should already be in the home directory, but in case you’re not enter cd ~ to get there. Now enter the following command which will download the file and then extract its contents (and as I just mentioned, be sure to change the filename if you're not using an arm64v8 based system):
wget -c https://github.com/bluenviron/mediamtx/releases/download/v1.8.1/mediamtx_v1.8.1_linux_arm64v8.tar.gz -O - | sudo tar -xz
Setting Up The AutoStart Script
Alrite, so we’ve downloaded all the software we need to get the stream working, all we need to do now is run it. But instead of manually running it every time I turn on the Pi, I’m going to set up an automated bash script that will run each and every time the Pi is powered on. The script runs quietly in the background and doesn’t require any input from the user. Let’s first go into DietPi’s configuration by entering sudo dietpi-config. Keep in mind if you’re using a different distro then the process of setting up a bash script at startup will be different, but you should be able to use the same script I’m about to use.
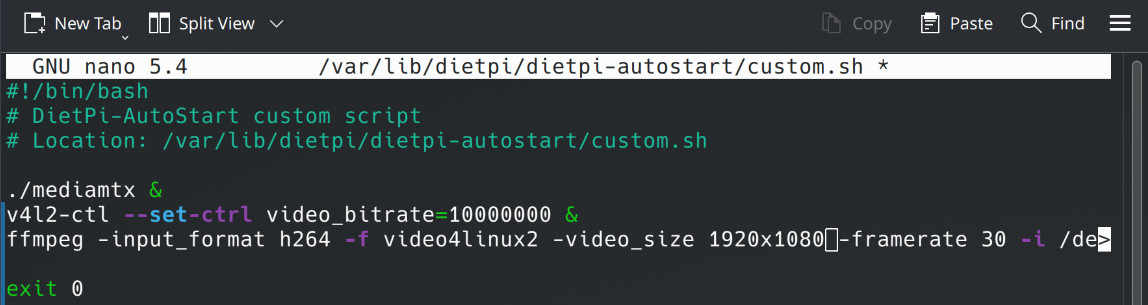
Now navigate down to AutoStart Options. Next go down to the Other section and select Custom script (foreground, with autologin), and Enter. This is where we’re going to paste several commands which will start the video server. Use the arrow keys to navigate the cursor above where it says exit 0. Copy and paste the following:
./mediamtx &

            v4l2-ctl --set-ctrl video_bitrate=10000000 &

            ffmpeg -input_format h264 -f video4linux2 -video_size 1920x1080 -framerate 30 -i /dev/video0 -c:v copy -an -f rtsp rtsp://localhost:8554/MyStreamName -rtsp_transport tcp
Lets go over what each of these commands does. The first line starts the RTSP server that will communicate with the local network. The next line sets the Raspberry Pi camera’s bitrate. If you’re not using the RPi camera, it’s important to remove this line completely since it probably won’t work with other cameras. I have mine set for 10 Megabits which I found to be the optimal bitrate for this resolution and framerate. You can set this value higher but I didn’t notice a quality difference at this resolution, so I think it’s better to save the bandwidth. Lowering the bitrate might be a good idea in certain situations, but I’ll come back to this in a minute.
The next line starts the camera and this is where you can change the video settings. If you’re not using the RPi camera and are using, lets say a built-in webcam, then you might need to change the values for the -input_format and -f input parameters since certain cameras use different compression methods. My Logitech USB webcam works with these settings, but my laptop’s built-in webcam required a different input_format to work.
If you have multiple cameras connected then you can specify which one to use with the -i tag. If you only have one connected then it will always be video0. If you connect a second webcam then that will be assigned as video1, and so on.
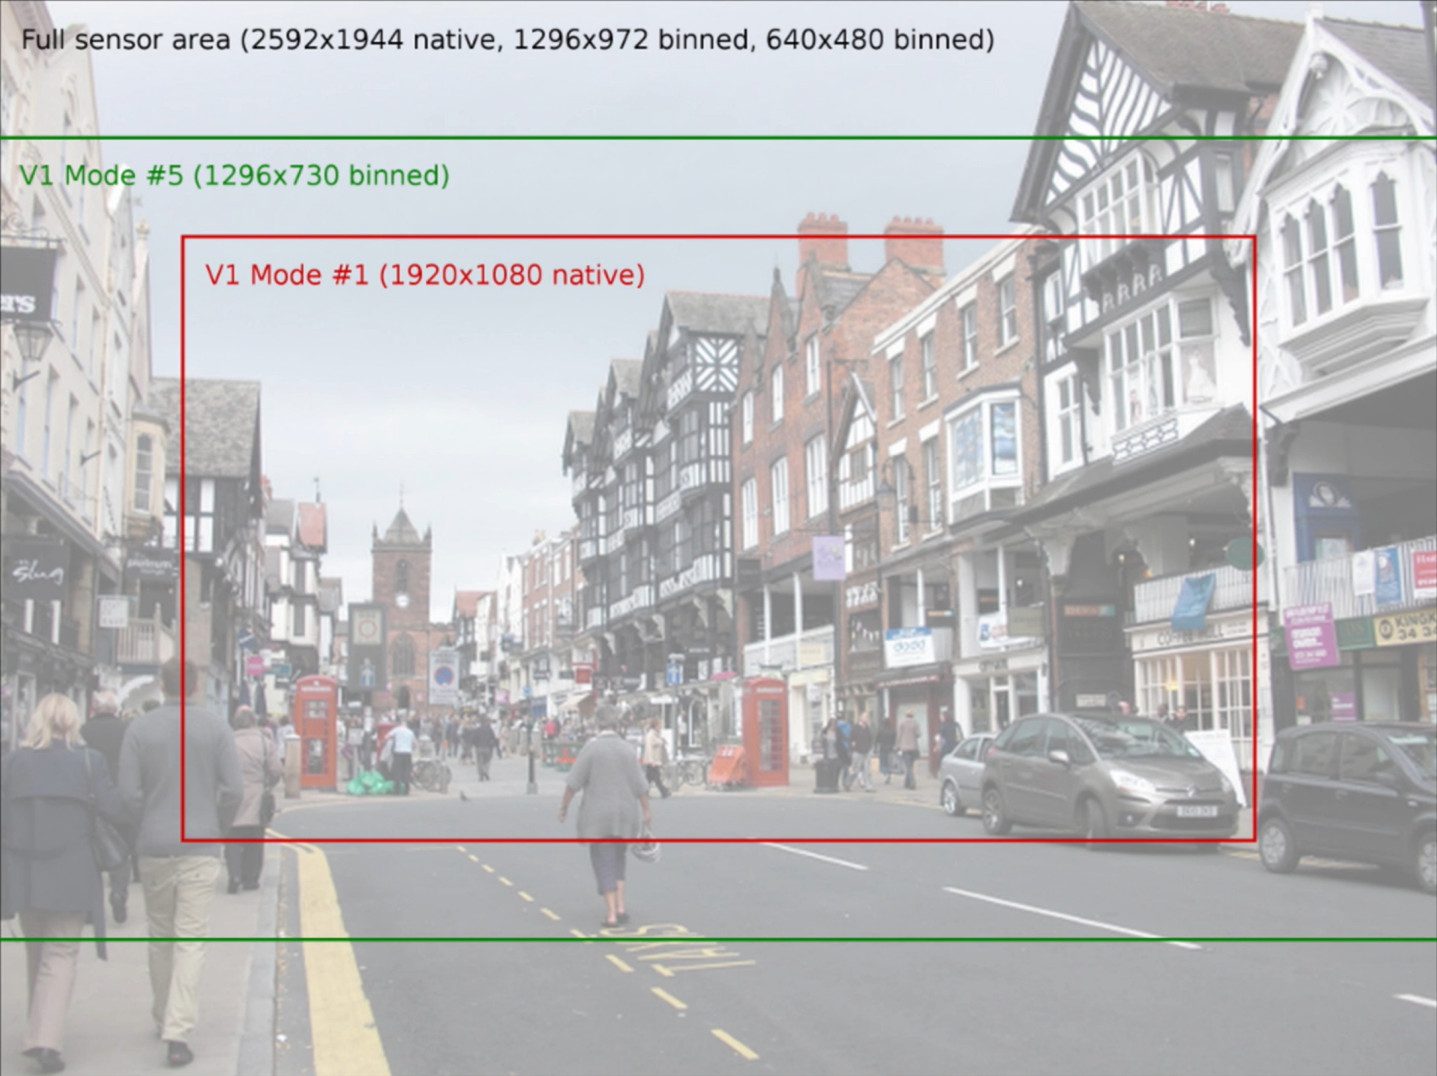
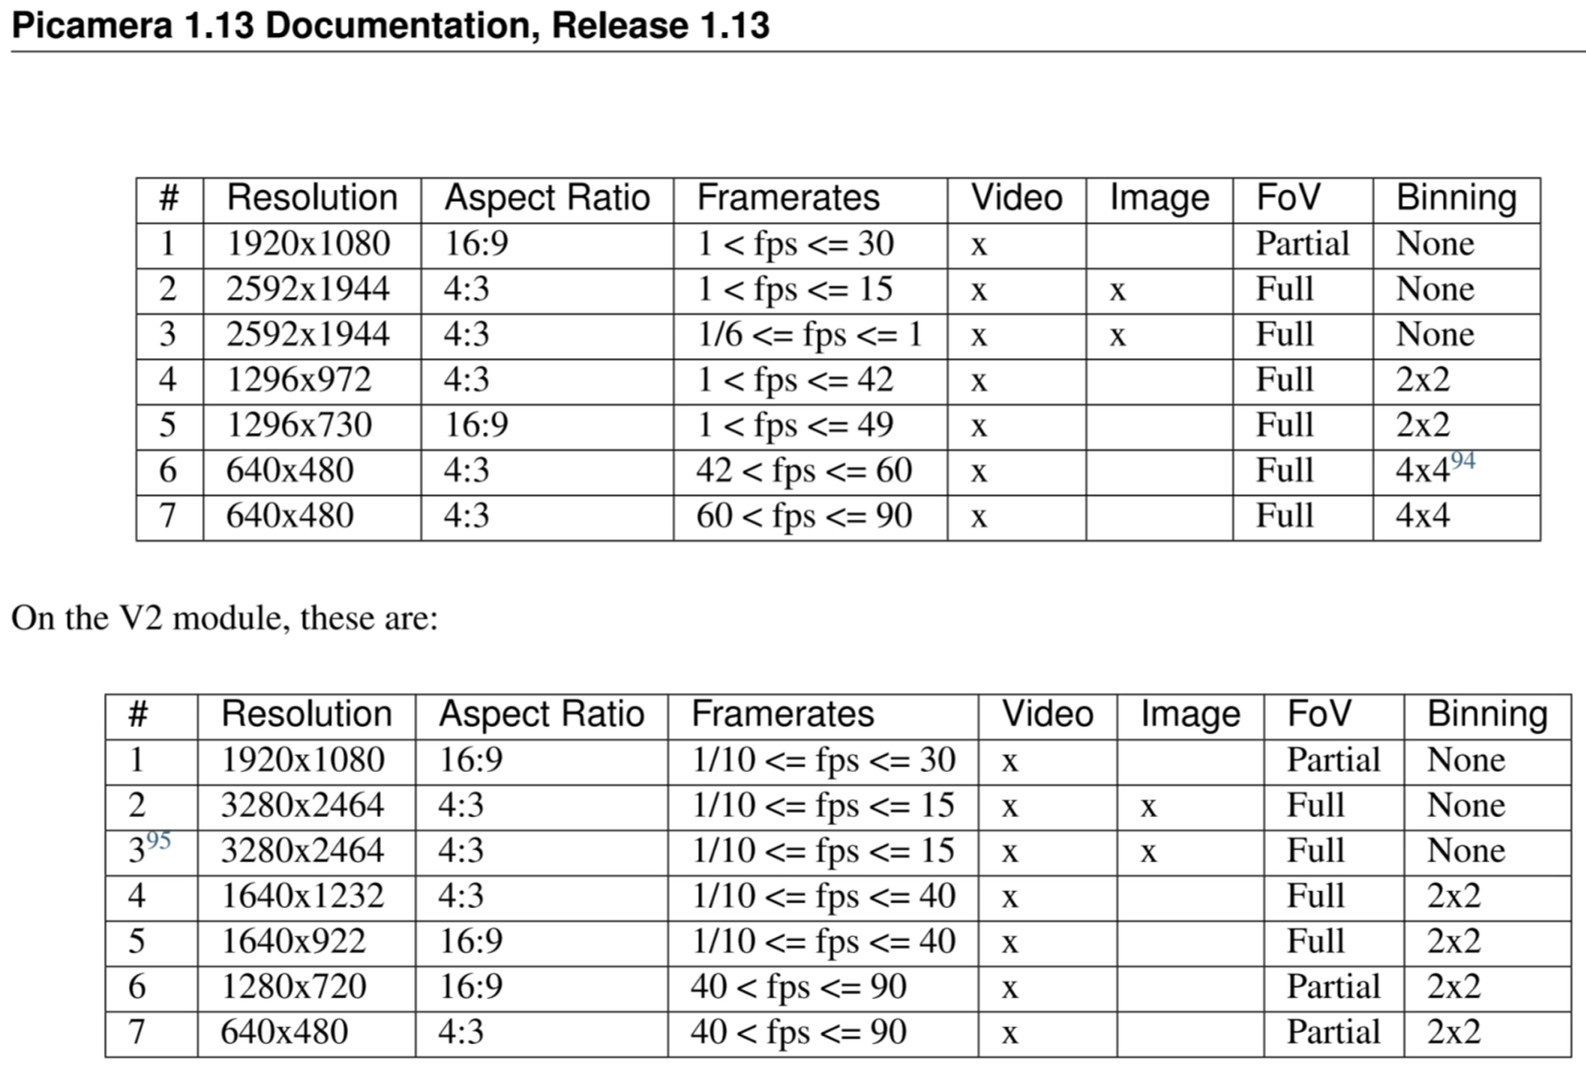
You can also select the video resolution and framerate here, but this will depend on what your camera is capable of. You can see in the picture the different video modes that the RPi camera v1 is capable of doing. Take note that different resolutions also give different field of views, so if you want the widest FOV you’ll need to go with a lower resolution than 1080p. Also take note of this list that shows which framerates are supported for each resolution.
Keep in mind the original Raspberry Pi and the RPi Zero might struggle with 1080p/30fps video. These models only have a single core CPU while all the other Pi models have a quad-core CPU, which gives a massive difference in performance. So if yours has a single core CPU, you’ll probably need to lower the bitrate and the resolution to 720p if you want smooth framerates, especially if more than one computer will be viewing the stream. Also if you have network problems such as bad WiFi connection, then lowering the bitrate can help in those situations as well.
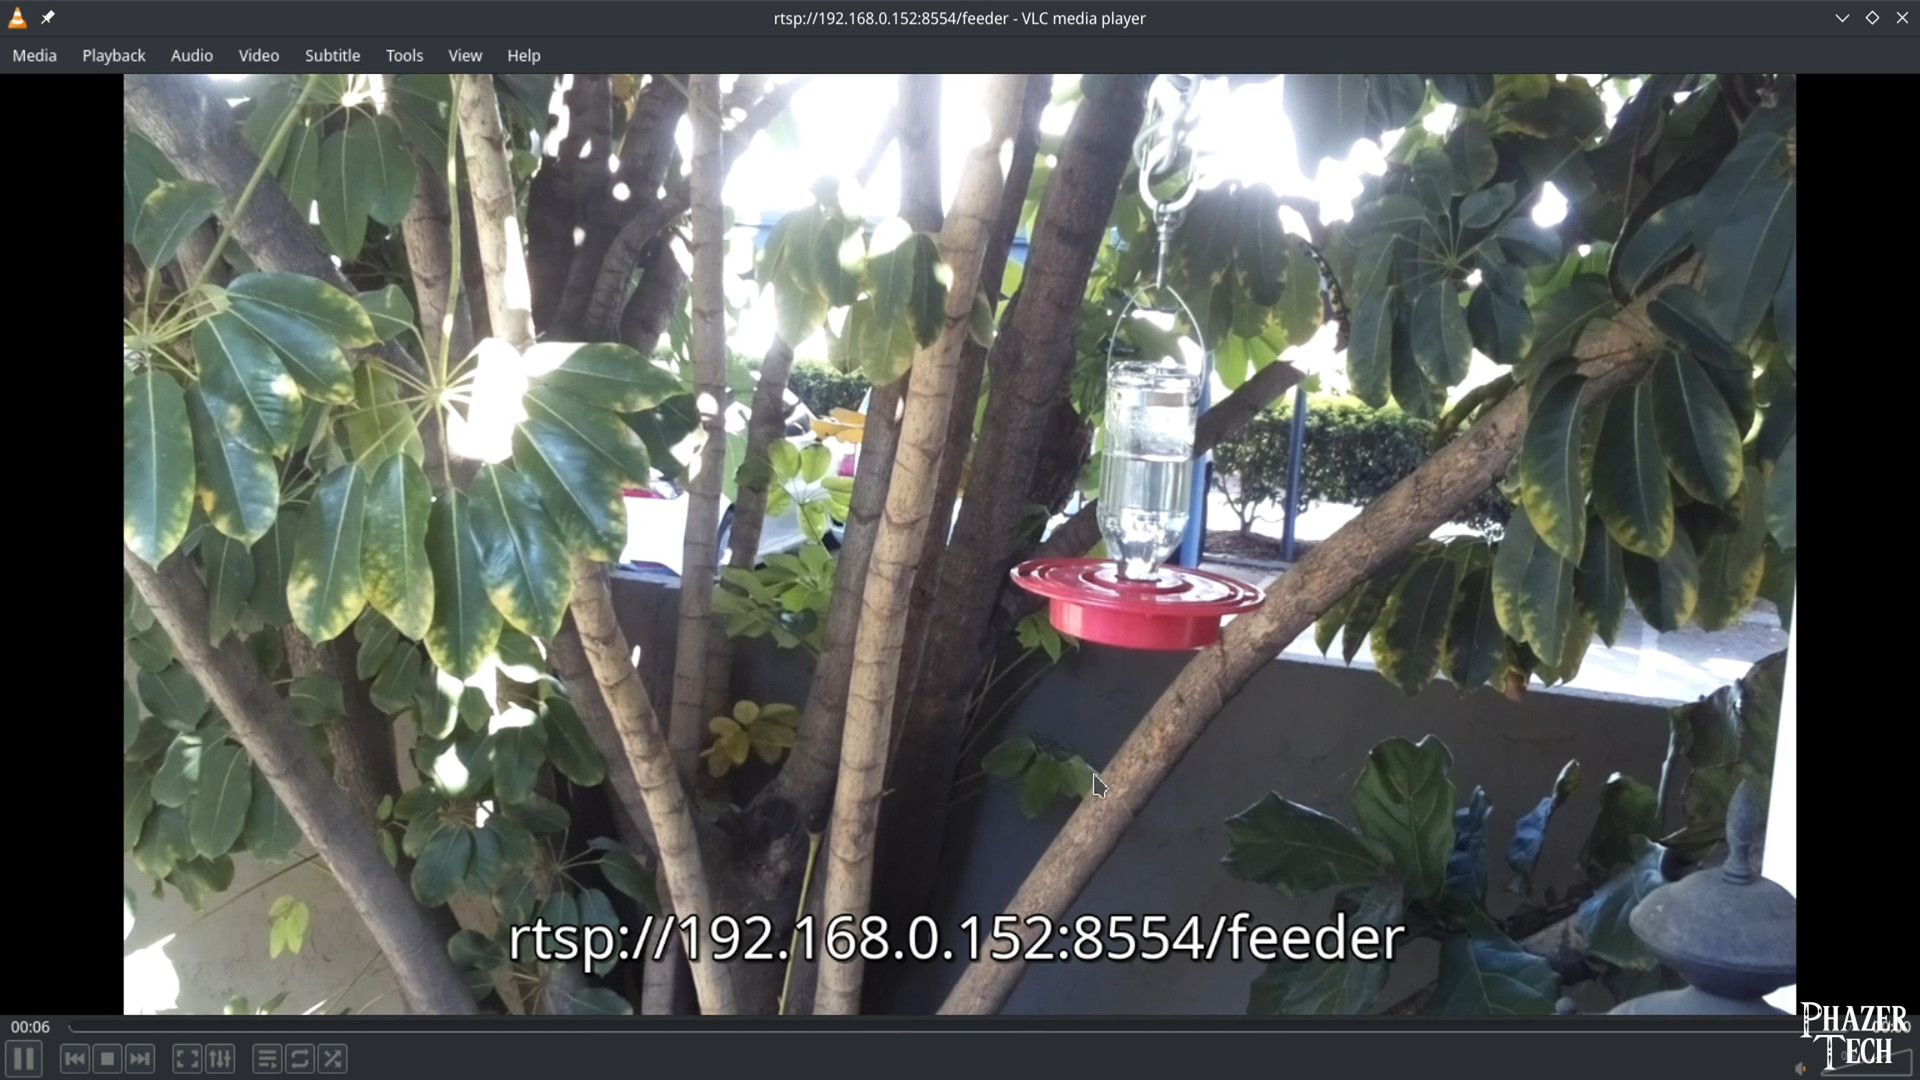
An important parameter you need to take note of is the address and port which your stream will be broadcasted to. I’ve replace MyStreamName in the provided command to be called feeder since I’ve set my camera to look at a hummingbird feeder in my backyard, but you can name it anything you want. It’s currently set to stream on port 8554.
Now let’s save this file. Press Ctrl+X and you’ll be prompted if you want to save the file. Enter y and Enter to confirm, and Enter again to confirm the filename. Now select the user with which you used to download the MediaMTX files. In the video I was using the root user, but as I pointed out at the beginning of this written guide, I now suggest doing everything under the dietpi user. It shouldn't hurt if you use the root user, but it's considered best practice not to use it. Now navigate out of the menu by going to Exit, then Exit again, and then select OK. Now let’s reboot the system. If everything went smoothly then you won’t need to log in to the Pi. Every time it turns on, it will automatically start broadcasting the stream.
Viewing The Stream
There are multiple ways to view the stream. It can be viewed in your internet browser from any PC connected to your local network by using either the WebRTC protocol or HLS. To use WebRTC, enter the address of your stream in the browser using this format: http://ipAddress:8889/MyStreamName. To use HLS simply change the port from 8889 to 8888.
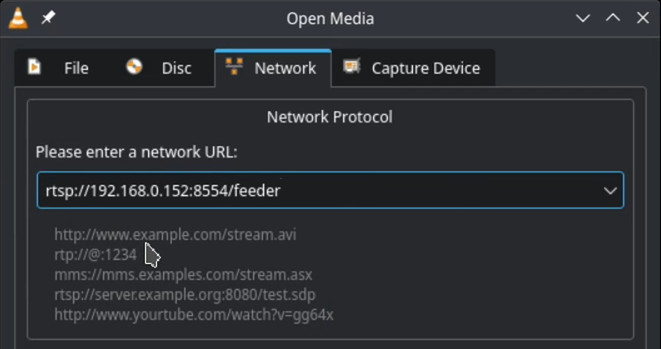
To view the stream using RTSP I recommend using VLC media player which is available for Windows, Mac, Linux, and other platforms too including Android. If using Debian or Ubuntu then be sure to download the flatpak version of VLC because the version that's provided by the Debian/Ubuntu repositories has dropped support for RTSP. Open VLC and click Media in the top left corner, then go to Open Network Stream. Enter the stream’s address here, in my case it will be rtsp://192.168.0.152:8554/feeder. You’ll need to change the IP address to what your Pi’s address is.
Then just push play and wait a few seconds, and you should now see your live video stream playing. It might hiccup for a second at the beginning, but once it gets going, it should be a flawless stream with minimal latency as long as you have a good network connection.
Conclusion
So that concludes this guide. If you have any questions or comments on this topic then be sure to check out the comments section in the YouTube video at the top of this page. Also stay tuned for more guides and tutorials. I'll be building upon what we did today by incorporating A.I. and object detection to turn your video stream into a Smart Security Camera.
If you appreciate these ad-free guides & tutorials then consider making a donation here. Anything helps and it ensures the site remains clutter-free from 3rd party ads. Thank you!
Have a question or business inquiry? Get in touch!